
Distributed version control met git
Deel 2 - Branches and secure workflows
In the previous tutorial, we learned how to create and clone a repository and how we can add and commit changes to version control. While this is useful knowledge when working on your own, it does not yet prevent conflicts when users are collaborating on a piece of software. That's where git branches come in and this notebook explains how they are used in T-HLs to ensure a secure workflow where software quality is assured.
git branches
git defines as a branch as follows:
Branching means you diverge from the main line of development and continue to do work without messing with that main line
So far we have worked with just one git branch master. But in a real software development project, we only want the master to contain the most recent approved version of the code. Bugfixes and changes should be made somewhere else and changes from different users should be combined somewhere to check how they play together before they can be merged with the master branch.
git branches allow this type of workflow to be created. Every project should have the following branches:
master: The latest approved version of the code. Only project admins are allowed to merge code into this branch;DEV: The development branch where changes from the different contributors are combined and tested before being merged with themasterbranch. Kind of like a beta but not actually released to the users of the software. Merges on this branch are also restricted to project admins;Developer 1: A named branch for the first developer where they can commit their changes. This is where all the hard work is done. Only the developer him/herself can write into this branch so that they can be sure that any changes where brought about by their own actions. Note that even project admins should be working in their own branch when they are making changes to the code.Developer 2: The same as above for the second developer...

The above branch structure with associated branch permissions should always be created in the remote repository (in Bitbucket).
Fetching code and checking out a branch
git defines fetch as an update of your remote tracking branches. It fetches information about the branches from the remote repository in Bitbucket. It does not yet switch branches. If you want to switch to your development branch, you will need to run the checkout command. Both commands can be merged into one and executed as one statement.
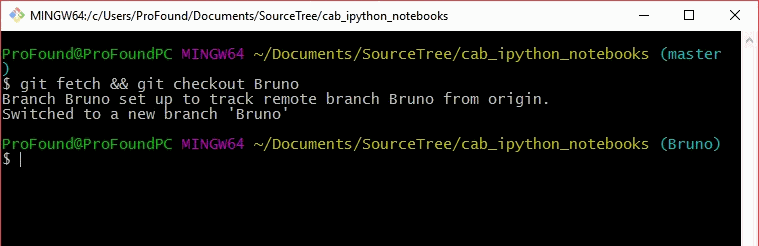
This switches the code to your development branch on your local machine. Upon checkout, the folder structure and file content of your code project folder on your machine will be converted to the state of your development branch.
Checking out branches allows you to very quickly check how different code branches behave. If you have made a change and something has gone awry, you can just checkout the master branch again to see how things behaved in the last working version. Even though developers don't have permissions on the remote master branch, they have full control on the local version. Let's just show how to hop back and forth between the master branch and the development branch.

Merging changes via pull request
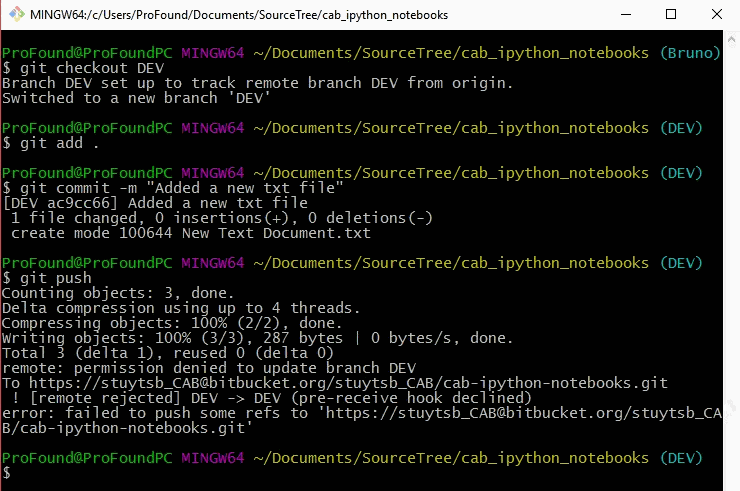
Imagine that you have completed a certain code update and want to bring your code into the DEV branch. You could try to checkout the DEV branch locally and merge your changes but when you try to push to the remote DEV branch, you will receive an error as you don't have permission to write onto the remote DEV branch. This strategy would also not be wise from a QA/QC perspective as there would be no review of the changes you made.
This is where pull requests come in. Pull requests can be thought of as request to the project admins to review your code before it is being merged onto the DEV branch.
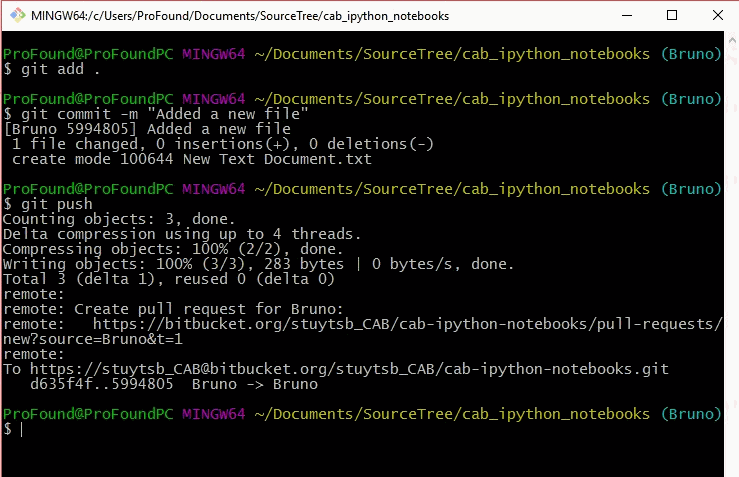
Before making a pull requests, you should first commit your changes to your local developer branch and then push them to the remote developer branch. Note that only you have the permission to make the push to your remote developer branch.
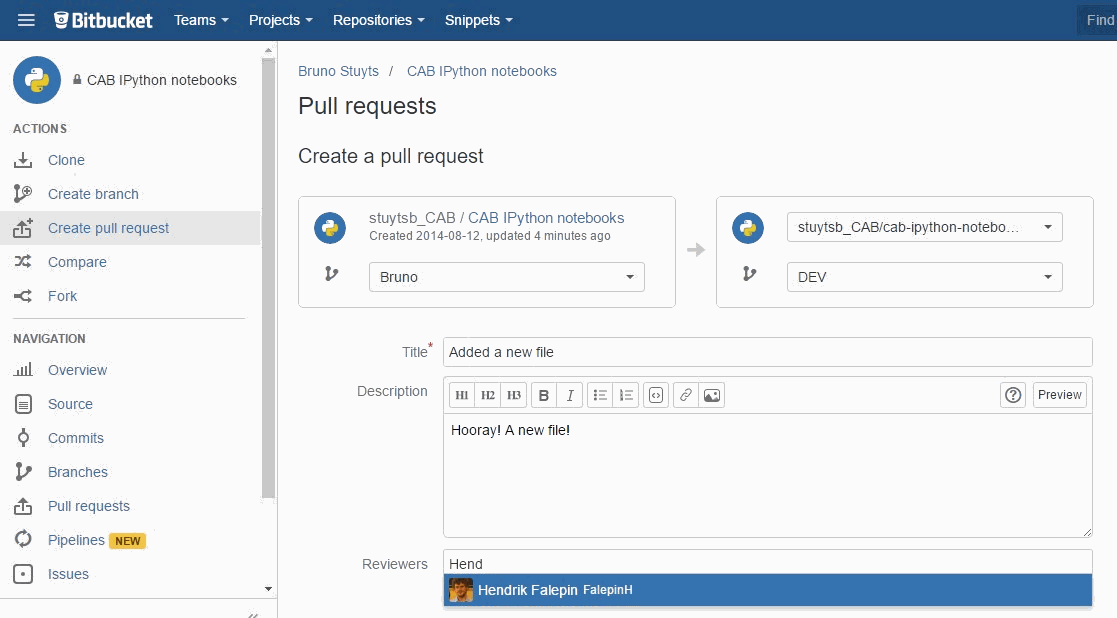
The pull request itself needs to be made through the Bitbucket web interface. With your remote development branch now containing your latest set of changes, you can go ahead and create the pull request from your branch to the DEV branch. You can explicitly ask members of the project team to review your code and annotate the pull request with a description of what you did. Note that it is also good practice to give self-explanatory titles to individual commits.
Project admins will be able to review your code changes and once they are satisfied, they will approve the pull request. If the code does not live up to expectations, they can also reject it.
Merging changes on the DEV or master branch back into your developer branch
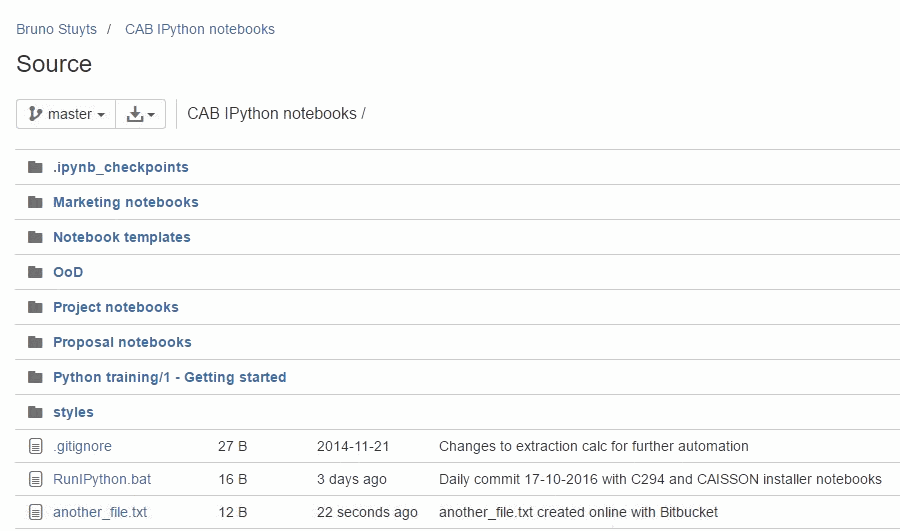
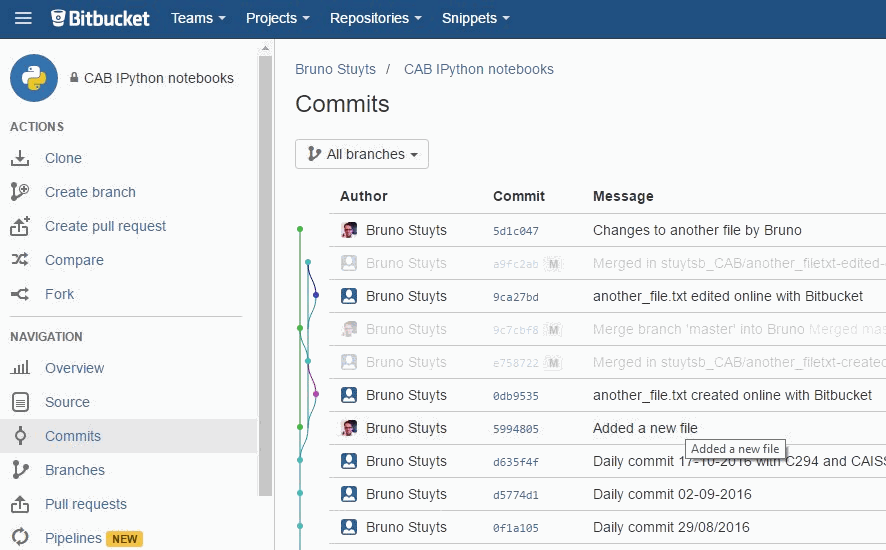
If a new version of the master branch is released (e.g. when all the changes for a new release are completed), you should bring the code on your developer branch back in line with the master. As an example, the file another_file.txt is added to the master branch and should be brought into the developer's branch.
After all, you don't want to be making changes to the previous version of the code. Merging the master is achieved by fetching repository information from the remote and running the merge command from your developer branch.
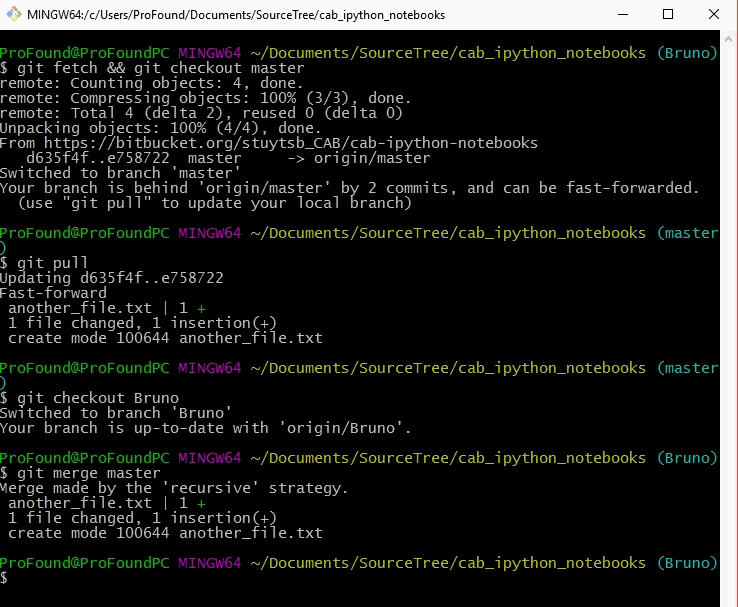
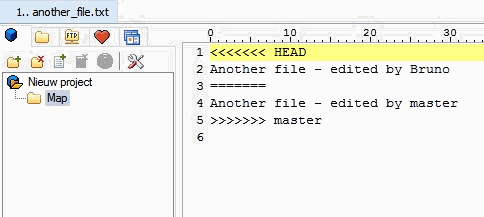
If there are any conflicts, git will highlight them and you will be asked to manually resolve them. git will create a temporary branch for this.

The conflicts can be resolved by just making the necessary changes in your code editor. What you keep will depend on the specific situation. In certain scenarios, you will want to keep your changes but in others you will want to go with the master. You can clearly see which is which in the code, separated by =======.
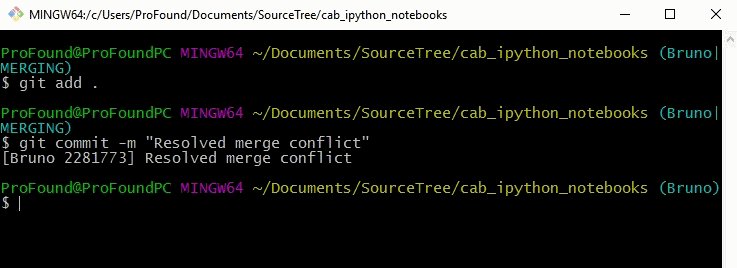
When you have resolved the conflict, just make a new commit and the merge will be completed
Rolling back to a previous commit
git is great at rolling back to whatever point in the code you want to be at.
Just look up the number of the commit you want to rollback to and execute the reset --hard [commit-number] command.
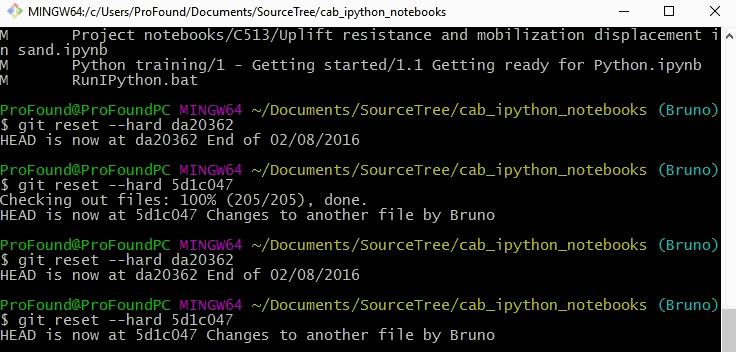
You can now just hop through the different states of the code. This is great if you want to reverse changes.
Summary
Here are the big points (literally) of this tutorial. Remember them!
- Only commit changes to your own developer branch
- Always create a pull request to the
DEVbranch when your changes are finalized. Pull requests are made on the Bitbucket online interface - When a new version of the
masterbranch is released, merge it with your development branch.